Welcome back.
In our previous article, we explored the diverse world of the most popular types of dental crowns today. I trust that you now have a solid foundational knowledge to choose a material that is not only aesthetically beautiful but also suitable for your functional needs and budget.
However, I understand that after choosing the “material,” a larger, more experiential question begins to surface: “So, what will I actually go through?” The fear of an unclear process, of sensations in the dental chair, of the waiting period… is completely valid. Anxiety often stems from the unknown.
Therefore, the purpose of this article is to “turn on the lights” for that entire journey. I will walk you through every step, every stage of a detailed A-to-Z dental crown procedure that adheres to international standards. Consider this a roadmap, a handbook to help you clearly visualize everything that will happen, so you can begin the porcelain crown process with a mindset of confidence, peace, and readiness to welcome your new smile.
The Foundational Stage: The First Appointment – Examination, Listening, and Planning
This is the most critical appointment, laying the groundwork for the entire success of the treatment. A quality consultation is not just a price quote; it’s a process of understanding and co-designing your smile. This stage typically lasts 60-90 minutes.
Comprehensive Examination and X-rays
Before we discuss aesthetics, your health is always the top priority. The dentist will perform:
- A General Examination: Checking the health of your gums, remaining teeth, bite (occlusion), and identifying any potential underlying issues (cavities, periodontal disease).
- Taking X-rays: This is a mandatory step. X-rays (typically a Panoramic and periapical films) allow the dentist to assess the tooth roots, bone structure, pulp health, and any pathology not visible to the naked eye. For more complex cases, a 3D Cone Beam CT (CBCT) scan may be indicated for a three-dimensional survey, ensuring absolute safety.
Listening to Your Desires and “Smile Design”
This is where modern dentistry truly shines. We don’t just fix teeth; we design smiles.
- In-depth Discussion: The dentist will spend time listening to your goals: What do you want your smile to look like? A natural white or a brighter shade? What about the tooth shape?
- Aesthetic Analysis: Based on clinical photos of your teeth and face, the dentist will analyze the harmony between your tooth shape, lips, facial structure, and even your personality.
- Digital Smile Design (DSD) Technology: Many leading dental clinics now use DSD technology, which allows for the design and simulation of your new smile on a computer. You can see the projected outcome, discuss it, and make adjustments with the dentist until you arrive at an aesthetic plan you are completely happy with.
Material and Shade Selection
Based on the analysis of your bite, tooth position, and aesthetic goals, the dentist will advise you on the most suitable ceramic materials (connecting to the knowledge from our previous article). Then, you and the dentist will select the tooth shade under natural light, using a professional shade guide to ensure the final color is perfectly harmonious.
Taking Study Impressions and Creating a Detailed Treatment Plan
At the end of the appointment, the dentist will take an impression of both your arches to create a plaster model. This study model is used for analysis and as a basis for crafting your temporary crowns later. You will receive a detailed written treatment plan that includes: the diagnosis, the number of teeth to be treated, the chosen ceramic type, the cost, and the estimated timeline.
The Second Appointment: Tooth Preparation and Taking Final Impressions

This is the appointment involving the main clinical work and the one that most people feel anxious about. This session typically lasts 2-4 hours, depending on the number of teeth being treated.
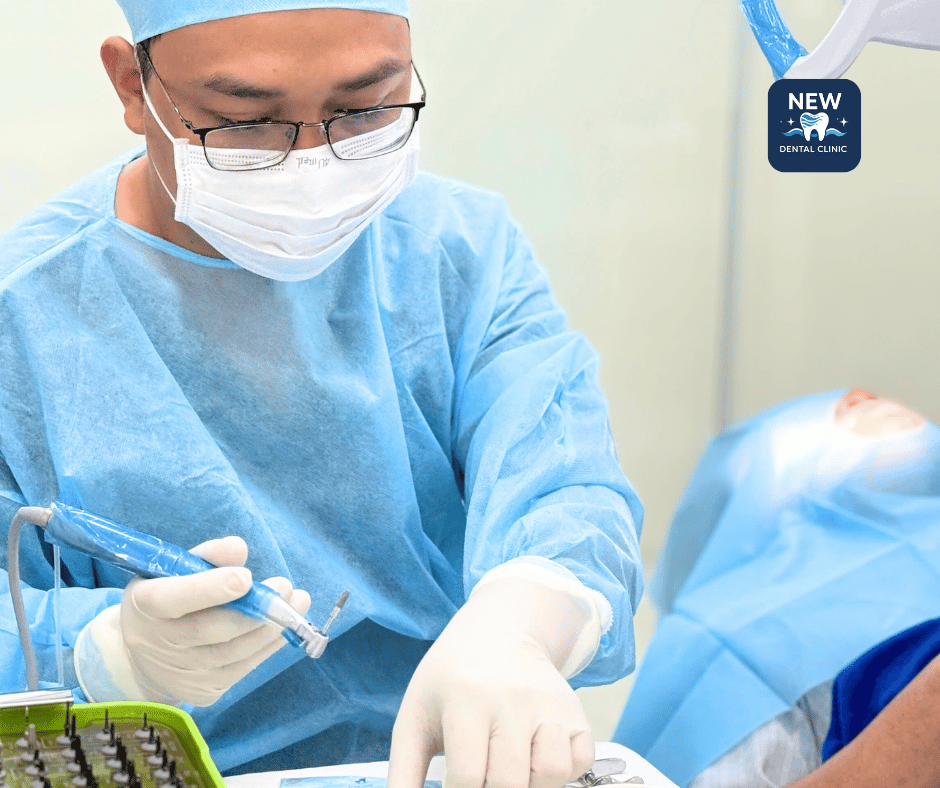
Local Anesthesia – A Completely Painless Experience
Rest assured, you will not feel any pain during this process. The dentist will administer a local anesthetic. Modern dental anesthetics are fast-acting and highly effective, ensuring you only feel a slight numbness in your lips and cheeks, with no pain during the procedure.
The Technique of Safe Tooth Preparation with Maximum Preservation
This step is the clearest demonstration of a dentist’s skill and ethical approach.
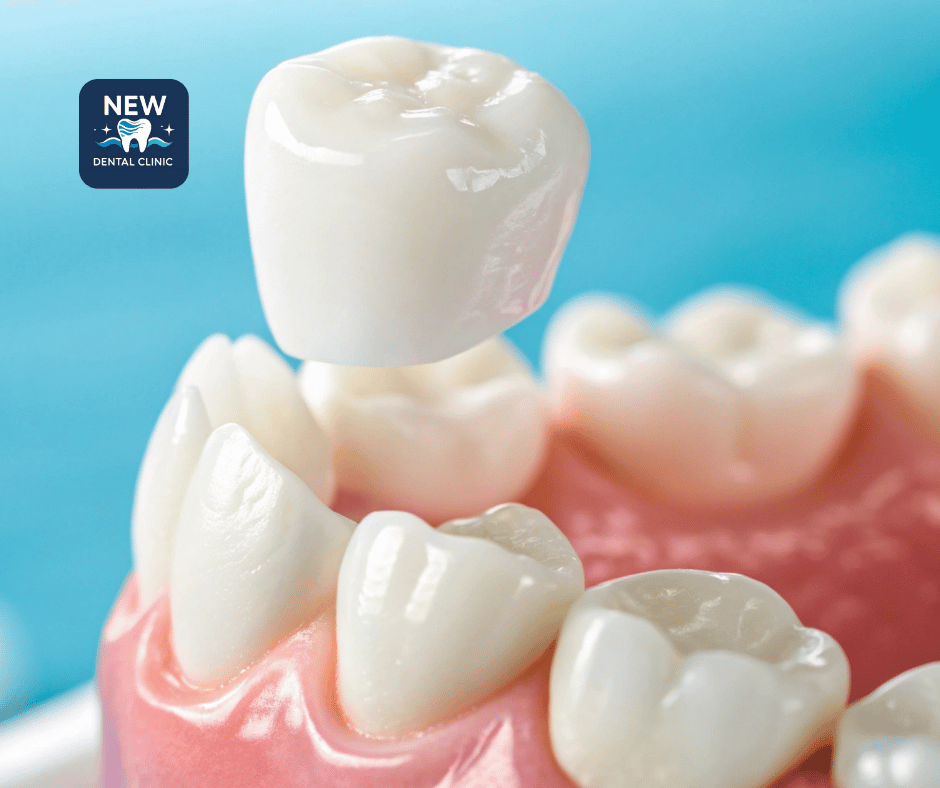
- Purpose: The tooth is minimally shaped or “prepared” to create a “core” with the proper form and space to accommodate the porcelain crown without it feeling bulky.
- Principle: A good dentist always adheres to the principle of “Maximum Preservation of Healthy Tooth Structure.” The amount of reduction is carefully calculated based on the chosen ceramic and the tooth’s condition, typically only 0.6mm to 1.5mm. Modern preparation techniques ensure sharp, smooth margins, allowing the final crown to fit with absolute precision.
Taking the Final Impression with 3D Scanning or Impression Material
After the preparation is complete, the dentist needs to capture a precise record of the prepared teeth to send to the dental laboratory.
- Traditional Method: Using a dental putty material. The dentist places a tray with a soft putty into your mouth and waits 3-5 minutes for it to set.
- Modern Technology (3D Intraoral Scanning): The dentist uses a small, wand-like scanner to gently move around inside your mouth. A complete 3D digital model of your teeth is generated on a computer screen with micrometer-level accuracy. This process is fast, comfortable, and provides superior precision.
Final Shade Matching and Placing Temporary Crowns
This is an extremely important step to ensure your comfort, function, and aesthetics during the waiting period.
- The Important Truth: You will NEVER leave the clinic with exposed, prepared teeth.
- Procedure: Immediately after taking the impression, you will be fitted with a temporary bridge or crowns made from high-quality composite resin.
- The Role of Temporary Crowns:
- Protect the Prepared Teeth: They shield the sensitive tooth structure from hot and cold stimuli.
- Ensure Aesthetics: They allow you to communicate and smile normally.
- Maintain Chewing Function: You can eat soft foods comfortably.
- Hold the Space: They prevent adjacent teeth from shifting.
The Laboratory Phase: Where Technology Meets Artistry
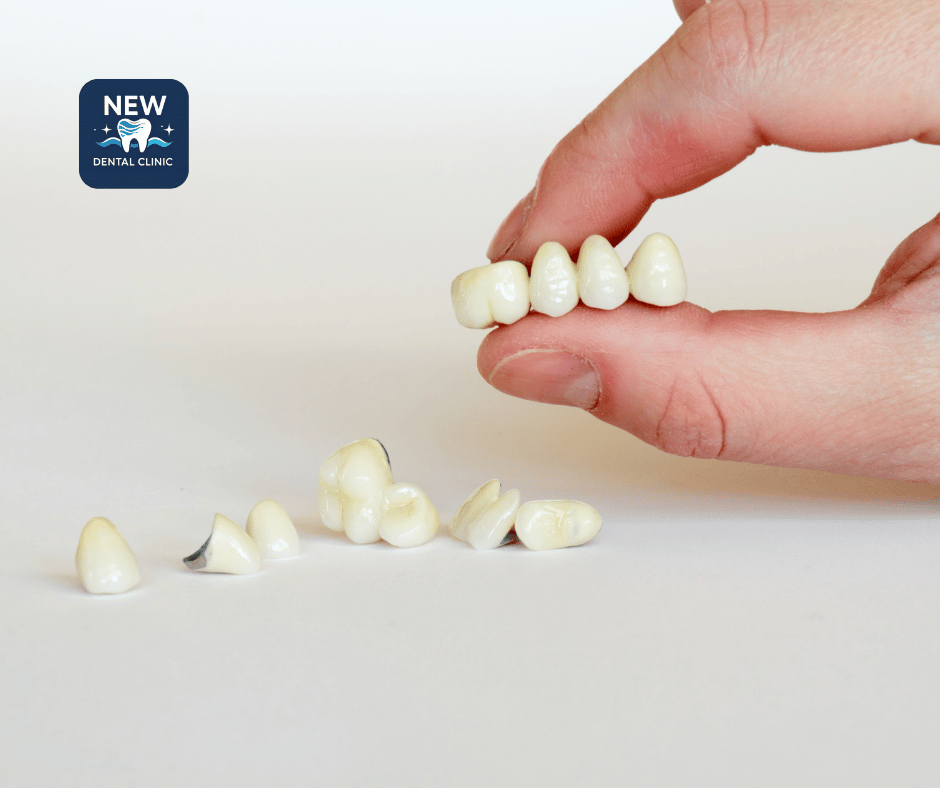
While you go about your normal life with your temporary crowns, the dental technicians (master ceramists) are meticulously crafting your new smile in the laboratory. This phase typically takes 2-5 days.
- CAD/CAM Technology (Computer-Aided Design/Manufacturing):
- CAD: The 3D scan data is loaded into a design software. The technician designs the shape, size, and contact points of each crown on the 3D model.
- CAM: Once the design is approved, a CNC milling machine automatically carves the crown from a solid block of Zirconia or E.max ceramic.
- The Ceramist’s Touch (Artistic Layering): For high-aesthetic requirements, after the core is milled, master ceramists will manually layer different shades and opacities of porcelain powders and then fire them in a high-temperature oven. This process creates natural effects like translucency at the incisal edge, making the crown come alive, just like a real tooth.
The Final Appointment: Delivering and Cementing Your New Smile
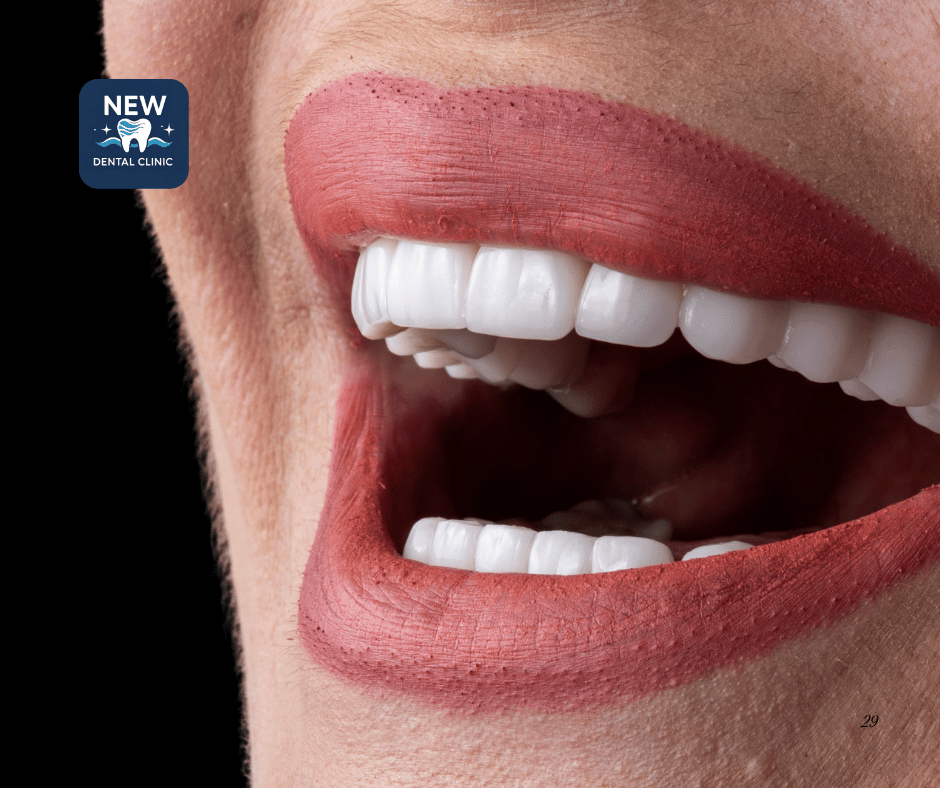
This is the highly anticipated appointment where you will see the final result for the first time. This session usually lasts 1-2 hours.
- Removing Temporaries and Cleaning: The dentist will gently remove the temporary crowns and thoroughly clean the prepared natural teeth.
- The “Try-In” Phase: The final porcelain crowns are placed on your teeth for evaluation. This is a critical cross-check between the dentist and the patient.
- Checking the Fit: The margin of the crown must fit the prepared tooth perfectly, with no gaps.
- Checking Color and Shape: You will be given a mirror to check if the color and shape are harmonious with your other teeth and overall facial features.
- Checking the Bite (Occlusion): The dentist will have you bite down on articulating paper to check the contact points, ensuring your bite is comfortable and functional.
- The Golden Rule: The crowns will only be permanently cemented when both the dentist and the patient are 100% satisfied.
- Permanent Bonding with Specialized Dental Cement: Once everything is perfect, the dentist will use a specialized dental cement to permanently bond the crowns onto your teeth.
- Bite Adjustment and Final Polish: The dentist will make final micro-adjustments to the bite (if needed) and give the crowns a final polish, removing any excess cement.
How Long Does the Entire A-to-Z Dental Crown Procedure Take?
One of the advantages of porcelain crowns is the relatively short treatment time. The entire process typically requires 2 to 4 appointments over a period of 3 to 7 days.
- Appointment 1: Examination, consultation, planning (60 – 90 minutes).
- Appointment 2: Tooth preparation, impressions, placement of temporaries (2 – 4 hours).
- Laboratory Waiting Time: 2 – 5 days.
- Appointment 3: Delivery of final crowns (1 – 2 hours).
- Appointment 4 (Optional): A follow-up visit after about a week for a final check-up.
Now that you have a detailed roadmap of the detailed A-to-Z dental crown procedure, you can see it’s a meticulous, precise, and highly controlled process at every stage. But I understand that even after knowing all the steps, a sensory question remains—a deep-seated concern that everyone has when thinking about tooth preparation and clinical procedures: “Is getting dental crowns painful?”. What will the actual sensations be like during and after each appointment? To completely alleviate this worry and help you embark on your journey with the utmost comfort, I invite you to explore the details with me in our next article.
